|
Once your AWS and JWPlayer configuration is completed, you can start setting up your products to deliver streaming video content through CloudFront.
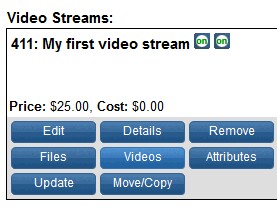
| 1. | Login to your AShop admin panel and open the page Catalog->Edit Catalog. |
| 2. | Look up or create the product you want to use to sell access to streaming video and click the new Videos button.
 |
| 3. | In the area Video Files To Sell, enter a name and a description for the video stream. You can also enter a comma separated list of tags, but this part is not currently used by the software.
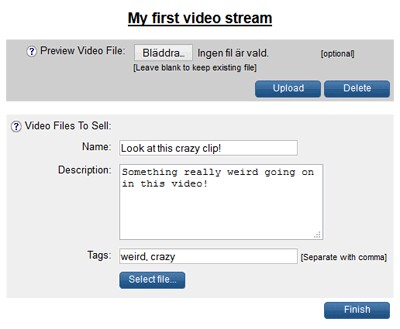 |
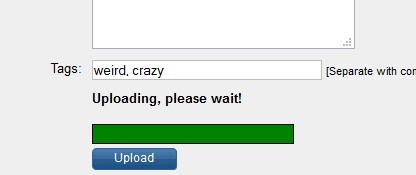
| 4. | Click the button Select file... to start uploading your video clip, which must be in mp4 or flv format. Note that if you use flv format, the file will not be playable on Apple iOS devices like iPad or iPhone, so mp4 is preferable. Locate the file on your hard drive and then click Upload. A progress meter will show you how much of the file has been transferred to your server.
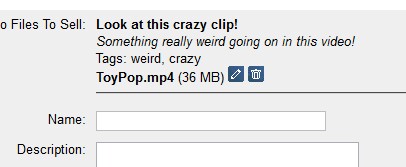
When the file has been uploaded, it will be transferred to your Amazon S3 bucket and once that is completed, the details of the video clip will appear above the form, where you can use the icons next to it to delete or edit it, if needed.
|
| 5. | Repeat steps 3 and 4 to add more video clips to your product, which will be shown in a playlist on the delivery page, allowing your customers easy and convenient access to the streams they have bought. |
| 6. | When you are done, click Finish to go back to the Edit Catalog page. Now your video streams will be accessible to customers who buy the product, through the AShop delivery area. |
|