Installation:
| 1. | Unzip the ashop_downloads.zip folder.
|
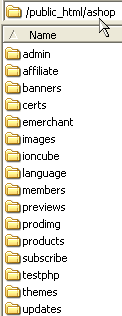
| 2. | Ensure that your FTP client is set to upload php files and images in binary mode. Upload the AShop files and folders to the server. You may change the name of the folder, but the AShop directory structure within this folder must remain intact. Note that the Unix/Linux file system is case sensitive. For instance, if you name the folder ashop in all lower case, the setting within config.inc.php must also be ashop (not AShop). The AShop files and folders may also be installed in the public root, which enables OrderForm pages to be anywhere in the public root or below.
|

|
OR |

|
When AShop is installed in the public root directory, OrderForm code can be used in all of the HTML pages on the site. However, in this case, other scripts running in the same public root directory, hidden files (.htaccess), and FrontPage configuration may conflict with the AShop scripts. If there is a lot already going on in the public root, it is safer to install AShop in a subdirectory.
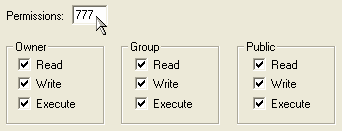
| 3. | Change permissions of the following directories and files to 777.
|
| admin/fulfilment
|
| admin/gateways
|
| admin/gatewayseur
|
| admin/gatewaysgbp
|
| banners
|
| images
|
| images/logo.gif
|
| ioncube
|
| previews
|
| prodimg
|
| products
|
| updates
|

| 4. | Create a database for AShop and add a user with a password to the database. If you do not have access to create a mySQL database on your server, then contact your web host technical support to have this done for you. You will need to get the database name, user name, and password that are assigned to the database by them.
|
| 5. | Open config.inc.php in a text editor such as NotePad or within your FTP program and edit the following variables BEFORE running install.php:
|
| $databaseserver = "location of the mySQL database"
|
| Note: $databaseserver is packaged with this set to "localhost", which is typical. If the database is hosted remotely or on a different server, this setting may be something like "mysql.server_name.com" or http://mysql.server_name.com. You may need to get the location of your mySQL database from the hosting service support.
|
| $databasename = "name of the database that you created in mySQL"
|
| $databaseuser = "user name that you added to the database that you created"
|
| $databasepasswd = "password for the user name that you added to the database"
|
| 6. | Run install.php from a browser. This will create the database tables. To do this, enter something like this into your browser address bar: http://www.yourdomain.com/ashop_dir/install.php
|
|
|
| 7. | Enter your Registration Key Code in the space provided.
|
|
|
8. You will then be redirected to the third party software integration page. You can skip this step by clicking the Skip This Step button at the bottom of the page. If you wish to add third party integration later, upload the install.php file and run it again. To add third party integration now, enter the full server path for each supported third party software application that AShop Deluxe will integrate to.
| ListMessenger
|
| phpBB
|
| ListMail Pro
|
| Password Administrator+
|
| AutoResponse Plus
|
|
|
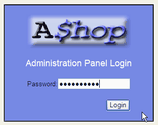
| 9. | Installation is complete. The next page will be the Administration Panel login. The default password is "ashopadmin".
|
| Note: From now on, login to the Administration Panel by opening the /admin/login.php script.
|
| Example: http://www.yourdomain.com/ashop/admin/login.php
|

| 10. | After installation of AShop is complete, remove the install.php file from the server and change the administrative password.
|
| 11. | HTML templates can be installed to format the catalogue, delivery, checkout and affiliate support pages. Some page formatting can be done in Administration Panel/AShop Configuration/Layout
|
| 12. | first.html – To display product specials or messages to customers when the catalogue is first accessed, modify the contents between the <!--AShopstart --> <!-- AShopend --> tags. Remove the first.html file from the server and the catalogue will open with the top category of products appearing initially.
|
| 13. | Many times the server time is different than your time zone. Also, many servers are set by Grenich Mean Time (GMT). To adjust the time stamp for orders and stats, set the timezoneoffset within the preferences database table.
|
After successfully installing AShop, login and setup the Store Configuration, then Edit Catalogue to add categories and products.
For technical assistance, use our Tech Service Request Form